Showing posts with label baking. Show all posts

Friday, January 13, 2012

Feeling Encouraged Yet?


"You are my lamp, O Lord; the Lord turns my darkness into light.
With your help I can advance against a troop;
With MY GOD I can scale a wall.

As for God, His way is perfect;
The Word of the Lord is flawless.
He is a shield for all who take refuge in Him.
For who is God besides the Lord?
And who is the Rock except our God?
It is God who arms me with strength
And makes my way perfect.
He makes my feet like the feet of a deer;
He enables me to stand on the heights.
He trains my hand for battle;
My arms can bend a bow of bronze.

You give me your shield of victory;
You stoop down to make me great.
You broaden the path beneath me,
So that my ankles do not turn."

- 2 Samuel 22:29-36

And this is totally off topic, but if I do not post it now, I may never get around to it.  A gal at work has a daughter who had a zebra-themed birthday party last Saturday.  She asked me to make the cake, which I, of course, did!  
Here was the final product.  Well, the almost final product:


Upon completion of the cake, I realized that I spelled the name wrong.  She only uses one "r" to spell her name.  But after making that vital correction, but cake was apparently a big hit!  I certainly hope it was anyway! 

Friday, October 14, 2011

Pinspiration

Thanks to Pinterest, I have managed to get LOTS of Fall baking and crafting done these past few weeks.  And thanks to my NEW JOB I have had lovely people to share my treats with!!! 

My mom recently decided to put a hot bar up at the office for patients to enjoy while they are waiting in the waiting room... And what goes better with a cup of coffee or tea than sweets?!  And who doesn't want to eat a frosting-laden cupcake right before or after getting their teeth cleaned!? (: 

So, in the spirit of Fall, and thanks to the creative people who made Pinterest possible, here are some more of the treats I have come up with for Fall so far:

 These little guys are my favorite.  They were super easy and turned out just as I hoped... they have found a special place in my heart! 

All you need to make these are:
Marshmallows
Sucker or cookie sticks
White chocolate coating
Black icing (I used royal icing so it would harden nicely)
Orange food coloring
Ribbon

For a step-by-step tutorial, hop on over here. 

Another easy, Halloween-themed treat were these candy corn cupcakes:


These things are pretty self-explanatory as far as how-to is concerned.  Since I was short on time, I made the process even easier by using a glorious thing called... BOXED CAKE MIX! 


All you need is:
Boxed cake mix (I used Devil's Food because that is what I had in the pantry)
Homemade frosting (I used Wilton's buttercream because it's easy.  And doubling the recipe made almost the perfect amount)
Yellow food coloring
Orange food coloring
Candy corns (optional) 

For a step-by-step, totally homemade version of these cupcakes, click here.  Her pictures are also much better than mine!!!

This cinnamon pumpkin bread (original recipe from Cheeky Kitchen) turned out wonderfully.  The only modification I made to the original recipe was replacing cinnamon chips with chocolate chips.  I actually wanted to use cinnamon chips, but didn't have any on hand.  And sometimes, you just have to work with what you've got!  


My favorite part about this recipe?  The cream cheese surprise in the center!!!

My next project is something non-baking related.  My mom and I found a great mirror/ coat hanger at Goodwill last weekend for ten dollars.  Even though it was in need of a little TLC, we snagged the thing, and with a quick paint job, transformed it into this: 


 It is the perfect addition to our little entryway. 


And the idea for handmade leaf garland came from here.  I only wish I could claim it as my own!

Today brings to an end the first week of my new job.  And this week has been the best I have had in a long time.  I absolutely love the job, and being at the office.  It is so fulfilling to go to a job that I feel truly and wholly invested in.  This week was the first I can remember that I have not gone to bed dreading waking up to go to work in the morning.  Quite the opposite actually... I have gone to sleep excited about the following days!  

And I will be going to sleep tonight EXCITED about our upcoming Saturday!  (:  

Monday, September 26, 2011

Cookies and Cakes

Well, LOTS has happened since my last blog post, so I am not exactly sure where to start. 

Let's start with the good news...

I quit my job!!!  I gave my two week's notice last Monday, so Friday is my last day.  And I probably should have prefaced that by saying that I do have a new job lined up.  And this is where the news gets even better.

I am going to be working part-time at my parents' office!  Now, I realize that for many people this may not be good new; however, I get along WONDERFULLY with my parents!  And I CANNOT wait to start my new job. 

A big part of me really did love my job.  I love the little victories that come with it, and I love becoming involved in other people's lives, but coupled with other things going on in my life right now, it has just become so draining.  I come home and by the time I unwind and then start my schoolwork, I am just exhausted.  I feel like I have not been myself for months.  And that just isn't fair.  It is not fair to Andrew, and it isn't fair to my family, and isn't fair to myself.  I want to be invested in the rest of my life:  my family, my education, and even hobbies. 

Since my parents mentioned their job to me, I have felt like a thousand pound weight has been lifted off my shoulders.  And Andrew will tell you that I have been back to my "normal, happy" self!  I feel such a peace about the whole situation.  Next week cannot get here soon enough! 

In honor of my new-found LIFE.... Cupcakes seemed appropriate.  

And after much debate, Snickerdoodle Cupcakes with Brown Sugar Cinnamon Buttercream seemed the PERFECT celebration treat. 


I used the original recipe from here, but halved it.  It ended up making 48 mini cupcakes.  Here are the only changes I made to the recipe, and I only made them based upon what I had and what I did not have on hand:
  • Used heavy whipping cream instead of half-n-half
  • Used only all-purpose flour rather than both all-purpose and cake flour
  • Used 2% milk rather than whole milk
  • I garnished with white, pearly sprinkles instead of cinnamon sticks!

 On a less happy note, I apparently have a staph infection in my leg.  On Friday at about 1am it started making me physically sick.  And apart from that, it looks totally disgusting.  So I went to a walk-in clinic on Saturday, where they put me on a few different meds.  I still seem to be running a fever off and on, but overall, I feel MUCH better today than I did over the weekend. 

My adoring husband (who has really proven his love by sticking by me and my disgusting leg... and my disgusting mood...) called in sick at work for me today.  The result? 


Lazy Maple Sugar Cookies

I REALLY wanted to bake, but did NOT really feel up to it.

So, with the help of Betty Crocker, I cheated.  This is so easy that even someone running a fever can handle it!!!!

Need:
  • 1 pouch of Betty Crocker Sugar Cookie Mix
  • 1 egg
  • 1/3 C butter
  • 1 tbsp flour
  • Maple syrup
  • Sprinkles galore!!!! 
Preheat the oven to 350 degrees, and while it is heating up, mix the cookie mix, egg, butter and flour until it forms a dough.  On a floured surface, flatten the dough until it is about 1/4 inch thick and, using leaf shaped cookie cutters, cut out as many cookies as your dough will make.  Mine made a dozen.

Bake for 7-10 minutes, or until lightly browned.

Let the cookies cool. 

Then, spread a thin layer of maple syrup over one cookie, and then cover with sprinkles.  Repeat this with each cookie until all of them are syrup-ed and sprinkled!!!


Voila!!!! 

Does it get any easier than that?  I think not. 

But, if you are in the mood to really bake, here is the recipe I would have used had I been in the mood to really bake. 

Moral of today's post? 

FALL is HERE, and GOD IS GOOD!!!!

Sunday, September 18, 2011

Two Down

Well, I successfully completed two of my five fall recipes over the past week.  And both were delicious.  Both were also incredibly easy. 

I made the baked oatmeal from Brown Eyed Baker, and halved the recipe exactly.  It was a little too much for me to eat all alone and all at once, so next time I make it I will half it once more.  Not to worry though... Lady helped me with the leftovers this time!  The only changes I made were in order to make it gluten and dairy free.  I replaced real milk with almond milk, and butter with a substitute. 


And also from Brown Eyed Baker, I made her sweet potato fries.  These were so good the first time that I actually made them for a second time yesterday!  They are simple, filling, healthy, and tasty.  The first time I made them I went a little nuts with the seasoning.  I added salt, pepper, and garlic salt.  It was a little overkill.  But the second time, I just salted and peppered them lightly.  They turned out perfectly.  I had them with veggies and was full and satisfied afterward! 


Not on the list, and not part of my celiac diet, are these cupcakes I made for a dear friend's birthday.  I cannot speak from firsthand experience, because I did not try them, but from what I hear, these were pretty darn tasty!  They are chocolate chip cookie dough cupcakes with peanut butter cream cheese frosting. 


I got the idea for these from here, but changed them a little according to what I thought the birthday girl would like!  Instead of using white cake mix, I used devil's food.  And for the icing, I went with peanut butter cream cheese as opposed to buttercream. 

Here is what I did for the icing:  

1, 8oz. pkg cream cheese
2tbsp milk
2 tsp vanilla extract
3 1/2 C powdered sugar.  

Blend the cream cheese and vanilla together.  Gradually add the powdered sugar and milk until completely smooth.  

I kept the cupcakes refrigerated until a few hours before everyone was ready to eat them. 

Sunday, September 4, 2011

The Details

Yesterday I posted the menu that we decided on for our dessert bar at Jenny's wedding.  Henceforth, this bar will be referred to as "The Sweet Bean," as that is what we finally chose to name it!


Today I will go down the list of items served at The Sweet Bean, and provide recipes for each dessert, as well as pictures to go along with them!

Whippersnaps
(This recipe yields between 40 and 50 cookies, depending on how big you make them.)
  • 1 box of cake mix (the flavor of your choosing; we used strawberry, lemon, and chocolate.)
  • About 2 cups of frozen whipped topping, thawed (I saw "about" because I eye-balled it.)
  • 1 egg
  • Powdered sugar for dipping
    • Preheat the oven to 350 degrees.
    • In a large bowl, combine the cake mix, the whipped topping, and the egg.  It will take a while for the dough to form, so be prepared for your stirring arm to get tired!
    • Form tablespoons of dough into balls, and roll them in the powdered sugar. (I used less than a full tablespoon of dough for each cookie, because they are prettier and sturdier the smaller they are.)
    • Place the cookies on a greased cookie sheet about an inch apart.
    • Bake 8 to 10 minutes.
    • Remove from the oven and let cool. 


Mini Banana Nut Muffins with Cream Cheese Frosting
(We made 445 of these.  I used the original recipe I found here, with some small modifications.  This recipe makes about 12 regular sized muffins, or 24 mini muffins.)
  • 1 1/2 cups all-purpose four
  • 1 tsp baking soda
  • 1tsp baking powder
  • 1/2 tsp salt
  • 3 bananas, mashed
  • 1/2 cup applesauce
  • 3/4 cup sugar
  • 1 egg
  • 1/3 cup butter, melted
  • handful of walnuts
    • Preheat the oven to 350 degrees, and grease a muffin, or mini muffin pan.  Or line with cupcake papers (which is what we did).
    • Sift together the flour, baking soda, baking powder, salt, and nuts.  Set aside.
    • Combine bananas, applesauce, sugar, egg, and melted butter in a large bowl.
    • Fold in the flour mixture, and mix until smooth.  Then scoop the batter into the muffin pans.
    • Since our muffins were mini, I baked them for 12 minutes.  If you make regular sized muffins, you will probably bake them for 25 to 30 minutes.  
For the cream cheese frosting, I used this recipe.  It turned out great, and held up wonderfully at room temperature.  The icing actually sat on the muffins at room temp for a few days before the wedding, and it was still fine!   Because we had some many muffins to dollop, I made six batches of this stuff, and had the perfect amount for the job.  So, a word to the wise:  if you are planning on making large quantities of frosting, begin the process in advance!!!


Cake Pops
(We made somewhere in the ballpark of 300 of these puppies.  People LOVED them.  You can fine a basic recipe for bake balls here, and then you can mix and match cake and icing flavors, as well as the chocolate coatings and toppings.)

An important note about cake balls:  After baking the cakes, and mixing them with icing, it is best to let them sit in the fridge for, well, as long as you like, before trying to form them into balls.  Some of our mixes sat in the fridge for hours before we formed them into balls. 

After forming the mixture into balls, you will want to let the balls set in the fridge for a while, or in the freezer for a few minutes, before attempting to dip them.  Otherwise, they will fall apart during the process.

I am NOT an expert on cake balls.  If you had watched Jenny and me make them, you would probably have laughed at the mess we made, and at how many cake balls we lost! Angie (aka: Bakerella); however, IS the expert.  And you can watch her step-by-step cake pop instructions here.   Warning:  She makes these little buggers look much easier and less time consuming that they actually are!


 We got the idea for the Neapolitan cakes here, but ended up using the recipe from Annie's Eats.  We had A LOT of cakes to make, so we doubled everything... three or four times!!!  Eventually, we had enough batter to make three, 12" layers, three, 9" layers, and three, 6" layers.  We also used the recipe for the strawberry layer of this cake to make Jenny and Matt's small cake that they used to cut and feed to one another.   


For the filling for the Neapolitan cakes, we used raspberry preserves and the same buttercream icing that we used for the outside of the cakes.  We also did this to fill Jenny and Matt's small cake.  


Buttercream Icing 
Let me warn you, TONS of shortening was used in the making of this icing.  For practical, aesthetic, and taste reasons, I chose not to use butter at all.  So the name "Buttercream" is a bit misleading...


  • 2 cups white, all-vegetable shortening
  • 2 tsp CLEAR vanilla extract (if you use regular, it will give your icing a strange tint.)
  • 2 tbsp water
  • 2 lbs. (one bag/about 8 cups) of confectioners' sugar, 10x's sifted
  • 2 tbsp Meringue Powder (I used Wilton)
    • In the bowl of an electric stand mixer, cream shortening, flavoring, and water.  Add dry ingredients and mix on medium speed until all ingredients have been thoroughly mixed together.  This takes a while.  You may want to turn your mixer on, and then walk away for a few minutes while it does its thing!  
    • After the icing is mixed well, you may find that it is too thick.  If so, add a tsp of water for each cup of powdered you used, and then turn the mixer back on until the water is incorporated into the icing.  
    • You can store this icing for several days at room temp.  If you choose to do this, make sure you store the icing in ROUND, AIR-TIGHT containers.  
(We used somewhere between 6 and 10 batches of this for the wedding... I lost count eventually...) 


To decorate the Neapolitan cakes, I wanted something easy, but also knew that Jenny would want something fun, kinda classy, and simple too.  I got the idea for the Rosette design here,  and am SO happy with the way it turned out in all-white! It is just Jenny's style!


 Moving right along...

We used the same recipe for the Mint Oreo cake that we used for the chocolate layer of the Neapolitan cake.   We made four, 10" layers, and then turned the layers into two, 2-layer cakes.  


 For the Mint Chocolate Ovaltine frosting, we chose this recipe, with some minor changes.  Since we wanted the cake to have a minty hint to it, we used 1/2 tsp of vanilla extract, and 1/2 tsp of mint, rather than just 1 tsp of vanilla.  I think we ended up using about six batches of this stuff, but don't quote me on that.  

We coated the tops and sides of these cakes with off-brand Oreos.  To give the cookies a minty taste, after we put them in the food processor, we dumped them into a bowl, threw a healthy amount of mint extract in there with them, and stirred it around a little.  Then we put our make-shift Mint Oreos all over the cake. 
 
Without question, the best smelling dessert at the reception was the pumpkin cake on the groom's table.  These things were Jenny's babies.  I made the frosting, but Jenny made each of the four, 9" pumpkin cakes.  They smelled like fall, and were absolutely beautiful!  You can find the original recipe here.  The only things Jenny did differently were to omit the nuts, and use regular flour rather than wheat, because we did not have any wheat flour on hand.  


To ice the pumpkin cake, Jenny said she wanted something "simple and rustic."  So, I went with this Brown Sugar Icing.  I followed the recipe exactly, but quadrupled it.  I definitely could have gotten away with tripling it instead.  Now I know for next time...


The Sweet Bean was only one of many sweet touches in the Elliot Wedding. 

 
Matt and Jenny's love story, and their lives, are centered around Christ.  Knowing that about them, and seeing that acted out in their relationship and in their lives, made every moment of their wedding day sweet.  


It was such an honor to be a part of their wedding day, and of the planning process in some small way!


Saturday, September 3, 2011

Beautiful Day

I may have mentioned this, and I may have not, but for the past several months a friend and I have been planning the dessert bar for her wedding.  She has a passion for baking, and wanted to incorporate that into her special day somehow. Together, I think we pulled it off exceptionally well.

We began planning the menu ages ago.  Jenny decided that she wanted to have a dessert bar, a coffee bar, and a smoothie bar at her reception rather than I full course meal.  If you knew Jenny, that would not surprise you!  Although I had nothing to do with the coffee or smoothie bars, I had a BLAST helping with the dessert bar.

After much planning and deliberation, here is the menu we finally settled on:

  • Whippersnaps (strawberry, lemon, and chocolate)
  • Mini banana nut muffins with cream cheese frosting (over 400 of them!)
  • Cake balls in the following flavors (all of which were a HUGE hit)
    • Red velvet with vanilla coating, some dipped in sprinkles,  and some in coconut
    • Chocolate dipped in chocolate and covered with mint Oreo, and chocolate dipped in chocolate with vanilla, chocolate dipped in chocolate with coconut... the list goes on.
    • Vanilla coated in vanilla and dipped in graham cracker, and coconut, and some with sprinkles.... WE MADE SO MANY!!!
  • Three Neapolitan cakes, all filled with buttercream and raspberry preserves:
    • a 12"
    • a 9"
    • a 6"  
  • A two layer, 6" vanilla cake, with lemon curd filling.  This cake did not get used at the actual dessert bar, because it fell apart.  But we had a backup strawberry cake on stand-by that turned out wonderfully!  No harm done!!!
  • Two 10" chocolate cakes with mint chocolate frosting, and covered in mint Oreo.  Yum.
  • Four Bohemian wedding cakes, all 9", with brown butter frosting.  These went on the groom's table.  
It felt like there were more cakes at the reception than people.  Definitely more cake slices...

Recipes and methods to follow... Along with more pictures... After I get a good night's rest!  (: 

But here is a sneak preview:


We all have Stefanie, a dear friend of the bride's, to thank for the lovely table-scape. Stefanie helped Jenny get ready the morning of her wedding, and played the piano during the ceremony.  She also sang one of the prettiest arrangements of Blessed Assurance that I ever remember hearing.  And on top of all that, she made the dessert bar look prettier and run more smoothly than I imagined it could!
 
None of the pictures I post will do the day justice.  The entire wedding was absolutely beautiful.   Because Matthew and Jenny are absolutely beautiful!

Tuesday, August 16, 2011

Another Keeper

If there is one thing I cannot stand it is buying food, and then watching it go to waste as no one in your house ever seems to want to eat it.  I love veggies, and I love fruit, but it is so hard to buy them because I never know for certain how much will get eaten and how much will get thrown out.  Menu planning is great, and helps avoid a lot of potential waste, but as we know, sometimes life gets in the way of our plans.  If someone ends up working late, or if we get stuck in traffic, or if friends call us last minute asking us to dinner... you know the excuses!!!!

One fruit that I know will never truly go to waste is the good ole' banana.  Even if they start to go bad, I can always find a way to put bananas to good use.  Heck, there are so many banana recipes out there it is almost impossible to choose one. 

We had three bad bananas in our kitchen, and I decided it was high time to make something of them.  After deliberating between banana bread, banana cake, cupcakes, muffins, the options seemed endless... I went with muffins.  Automatic portion control.  Easy to grab-and-go with in the morning.  Practical.  Muffins seemed the obvious choice. 


The original recipe for these banana muffins actually refers to them as "Oatmeal Banana Cupcakes."  But they are definitely muffins.  And anything with the words "oatmeal," and "banana" has me hooked. 

I got the original recipe here, and made a few changes based on the comments of others who tried the recipe.  Here is what I did: 

Oatmeal Banana Cupcakes (That are actually muffins)
  • 1/2 Cup Extra Virgin Olive Oil
  • 1/2 Cup Sugar
  • 4 egg whites
  • 3 medium sized ripe, mashed bananas
  • 1/2 Cup honey
  • 2 Tbsp applesauce
  • 1 1/2 Cups all-purpose flour
  • 1 Cup quick-cooking oats
  • 1 tsp baking powder
  • 1 tsp baking soda
  • 1 pinch of salt
  • Cinnamon sugar

  • Preheat the oven to 350 degrees.  Cream together the EVOO and sugar.  Add egg whites, bananas, honey, and applesauce.  Mix well.  
  • In a separate bowl, combine the dry ingredients.  Stir the dry ingredients into the creamed mixture just until moistened.
  • Fill paper-lined muffin cups 2/3 of the way full. 
  • At this point, I chose to sprinkle (or douse) each muffin with cinnamon sugar before baking.
  • I baked my muffins for 17 minutes, although the original recipe called for 18-20 minutes of baking.  

*This recipe yields 18 muffins. 


Tuesday, August 9, 2011

Best Ever

Andrew's summer has come to an end, and he went back to school about two weeks ago.  Kids started last week.... Summer just flew by!!!!  Andrew is teaching 9th and 11th graders this year. 
Because of my school and work schedule, I am going to be able to meet Andrew for lunch on Thursday.  Lunch starts right after second block, which just so happens to be 9th graders!  So, I asked Andrew if it would be okay for me to go inside on Thursday, meet the kids, and most importantly, bring them cookies. 

I found this chocolate chip cookie recipe that I have been dying to try (think I have even written a post about it before).  And this occasion seemed like the perfect excuse.  Not only were these the best chocolate chip cookies I have ever made, but they were also the easiest.  The reasons I was originally drawn to them were #1) the lovely pictures posted on Sugar and Charm, and #2) the fact that they are BUTTER-LESS!!! I HATE making chocolate chip cookies with butter... the butter part always seems to get me. 


But these are perfection.  The texture is perfect, and the cookies turned out beautifully... just like the picture.  Which is something I am RARELY able to claim!  (: 

You can click here for the original recipe, which I followed exactly. 

Ingredients
2 1/2 cups flour
1 teaspoon baking soda
1/2 teaspoon baking powder
1/2 teaspoon salt
1 cup vegetable oil
1 1/2 cup brown sugar
1/2 cup white sugar
2 eggs
1 teaspoon vanilla
1 teaspoon almond
2 cups semisweet chocolate chips

Directions
Preheat oven to 350 degrees.
Combine flour, baking soda and salt and set aside
In a mixing bowl cream together oil, brown sugar and white sugar. Beat in eggs one at a time, then add in the vanilla and almond extract.
Blend in dry ingredients and fold in the chocolate chips.
Bake for 8 to 9 minutes and then let them cool on the pan before moving them to a wire rack.

Monday, June 27, 2011

GOODness Gracious

Well, true to my word, I spent a small portion of my weekend putting to use that box of cake mix I mentioned in my last post.

And let me tell you... the result was GOOD.

I decided to go with my gut and make the cake batter truffles, although the choice was a tough one.  But once I taste tested the completed creation, I knew I had chosen well!  How did I know? Because my gut was SO FULL of cake batter truffles by the time I finished making them that I felt slightly miserable.  (:

True to their name, the cake batter truffles tasted much more like cake batter (versus actual cake) than cake balls.   The texture was similar to that of uncooked cookie dough (divine!).  I LOVED the taste of these, and also the ease; they do not require any baking.  The entire process took much less time than cake balls take.  From start to finish, I was done in under half an hour, whereas the process of making cake balls literally takes hours (at least for me).

 The truffles fell short in one category only, and that is the "presentation" category.  Cake balls are much prettier!  But maybe on my second go around with the truffles I can work on perfecting the technique a bit; that might improve their aesthetic appeal. 
 Next time I make these, I will probably leave out the salt that the original recipe calls for. As far as the method is concerned, I will let the dough chill for several minutes before attempting to form it into balls.  And after I form the balls, I will let those chill for a good hour before dipping them into the chocolate.  The original method calls for chilling them only fifteen minutes, but they seemed difficult to work with when I did it that way.  I think waiting until they are a bit colder and firmer will make the whole dipping process a lot easier!
I had to give these away immediately.  I knew that keeping them around too long would be dangerous...

Thursday, June 23, 2011

Hey, Batter, Batter

Our OFFER group was supposed to go to a Nashville Sounds game tonight.  Inclement weather thwarted that plan, so I took that as a sign that I needed to attend yoga class with my sister.  So, somewhere around mid-class or so, my mind starting drifting, and I eventually found myself pondering what I should do with the box of Funfetti cake mix that has been sitting in our cupboard at home.

Here are some very promising options:


Cake batter blondies.  These look KILLER.  Thank you, Gracie, for sharing the recipe!  I can't wait to try it!


Although the blondies look like they are probably hard to beat, this Funfetti pound cake recipe looks like is has potential too.  Thank you, Alex!
And who doesn't love a good pancake on a lazy Saturday morning?  These cake batter pancakes, from Jessica, at How Sweet It Is, take "good pancakes" to a whole new level! 
Although the above three recipes all look incredible, this last one takes the cake.  I am so excited to try out these cake batter truffles!


Hmm.... my sweet tooth seems to be flaring up all of a sudden...

Tuesday, June 21, 2011

Brownie Bites

A dear co-worker and friend celebrated a birthday last week.  The sad part about that is that her birthday was actually over two weeks ago; we just had not had a chance to get together and celebrate until last week... which is just plain sad! 

But, we were finally able to break away from work for a bit on Friday, and end the week with a little birthday celebration!  And in my book, no birthday celebration is complete without some kind of sweet birthday treat. 

For this occasion, I chose these brownie bites.  Factors leading to my decision were as follows:
1)  The ease of the brownie bite making method  (: 
2)  The speed of the brownie bite making process
3)  The durability of the brownie bite (aka:  You can save them for a long time after you make them)
5)  The cuteness of the brownie bite
4)  The taste of the completed brownie bite... It tastes awesome whether you have it an hour after you make it or a week after you make it! 


To make these, you will need:
1 boxed brownie mix, and the ingredients called for per the back of the box
1 package of candy coating, the flavor of your choosing (I chose white chocolate.) 

-Bake the brownies as the package directs. 
-Then, after they cool for a bit, crumble the brownie up in a bowl.... Just kind of mush the brownie up.  -At this point, I put the bowl of mushed brownie in the refrigerator to help it cool. 
-Once it has firmed up a bit, form the brownies into balls.  I make mine pretty small, so that there is plenty of white chocolate coating per bite of brownie.
-After the balls are formed, I put the lollipop sticks in them, and used the sticks as a handle for dipping.
-Melt the candy coating using the heating method on the back of the package (usually the package instructs you to heat the coating for one minute, stir, and then continue heating in 15 second intervals until the coating is completely melted)
-When the coating is melted, dip the brownie bites into the coating, one bite at a time. 
-Let the brownie bites harden completely. 
-I think they are best when served chilled, and so I store them in the refrigerator.  If I have LOTS of them, I put a few in the refrigerator, and store the rest in a sealed container in the freezer.  

The advantage of brownie bites versus cake balls is that brownie balls are MUCH easier and faster to make.  That being said, I have to admit that I like the taste and texture of cake balls better.  They may be worth the bit of extra time and effort.  Cake balls are moister, and sweeter!  So they still trump brownie bites in my book.  But these are definitely worth a shot! 

Monday, June 20, 2011

Eat

As you may know, I have been in house mode lately.  Particularly with Andrew being gone, the house has given me something to focus my mind and energies on (though I need to be switching these thoughts and efforts toward things like SCHOOL very soon... as in... should have done that yesterday, soon).

After finding this lovely idea, along with step-by-step instructions, thanks to the beautiful blogger at Sugar and Charm, I could not help but try making the letters myself.  And it was SO easy!

Here is her version of the concept:

And here is mine (my photo is sorely lacking in comparison to hers, so please be gracious!)  
I am pleased with the way they turned out!

Just for fun, here is more lovely inspiration you will find over at Sugar and Charm...

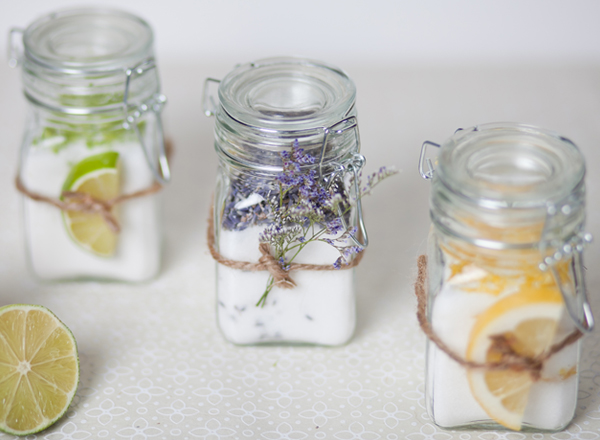
Infused sugar with quick "how to" instructions.
 Beautiful photos that get your creative juices flowing.
Sweet recipes like this one!
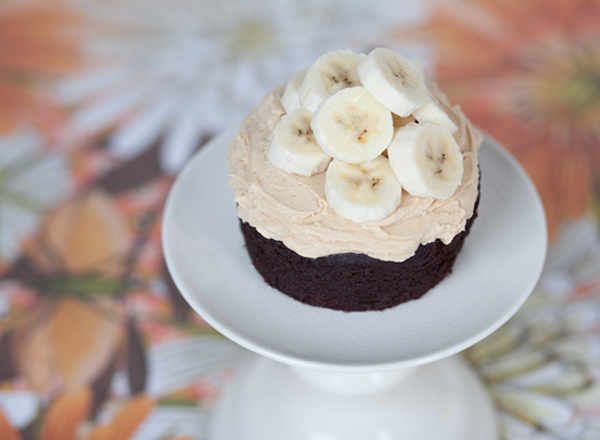
And this one (I am a sucker for peanut butter frosting!)


Sunday, June 5, 2011

Can I OFFER you a dessert?

Andrew and I are part of a small group through our church (the groups are called OFFER groups).  The people in our group have become some of my dearest friends.  And I could not have made it through the past week without their love and encouragement.  We "officially" meet about twice a month.  We do a Bible study together, but we usually eat and fellowship as well.   We met tonight, and my task was to provide dessert.  This particular dessert got their seal of approval, so I thought I would share. 

I found the recipe for these chocolate chip cookie dough brownies a few days ago, thanks to recipegirl.  All it took was reading the title for me to know that these would climb the ranks to the top of my "favorite treats" lists.  And my hunch was right.  These were killer.  And they are definitely best chilled.  The only change I made to the original recipe is that I used jumbo chocolate chips rather than mini chocolate chips, simply because I had jumbo chocolate chips on hand. 


Bottom line: These were an easy, crowd pleasing dessert.  I just had to make sure NOT to bring any leftovers home.... that could have been dangerous!